When planning an automated gate installation, most customers spend a great deal of time choosing the gate style, post design, operator and access-control features. One detail that can easily be overlooked is the location of the control panel.
The control panel is one of the most important parts of a swing gate system. It houses the electronics that tell the gate when to open, close, stop and respond to connected accessories. Its location affects the amount of wiring required, the ease of installation and how simple the system will be to service in the future.
Although a control box can technically be installed in several locations, choosing the right position from the beginning can help reduce unnecessary wiring, avoid additional connections and create a cleaner, more reliable installation.
Table of Contents
Understanding the Gate Control Panel
What Does the Gate Control Panel Do?
The control panel acts as the central operating point for the automated gate system.
The operator, safety devices, remotes, keypads, exit sensors and other accessories communicate through the control panel. When a remote button is pressed or an access code is entered, the control panel receives the signal and tells the operator what action to take.
On a swing gate system, the control board is generally housed inside a separate weather-resistant control box. This box is installed near the gate and connected to the operator through underground wiring.
A sliding gate is arranged differently. In most slide gate systems, the control board is already housed inside the operator cabinet. The main electrical power is brought directly into the slide gate operator rather than into a separate control box.
Even with a sliding gate, some installations may include an additional enclosure where accessory wiring and connections are organized before being routed back to the operator.
How Is a Slide Gate Different?
With a sliding gate, the main control board is generally located inside the gate operator itself.
The electrical supply is brought directly to the operator cabinet, and the operator houses the equipment needed to control the gate.
Some slide gate installations also use a separate control or junction box. Accessory wiring can be brought into this enclosure, connected and then routed back to the operator.
Because a slide gate does not rely on a separate swing gate control box in the same way, the placement can be more flexible. However, the available wire length, conduit path and service access still need to be considered.
The enclosure should remain close enough to the operator to avoid unnecessary wire extensions and should always be accessible for future service.
Choosing the Control Panel Location
Where Is a Swing Gate Control Box Normally Installed?
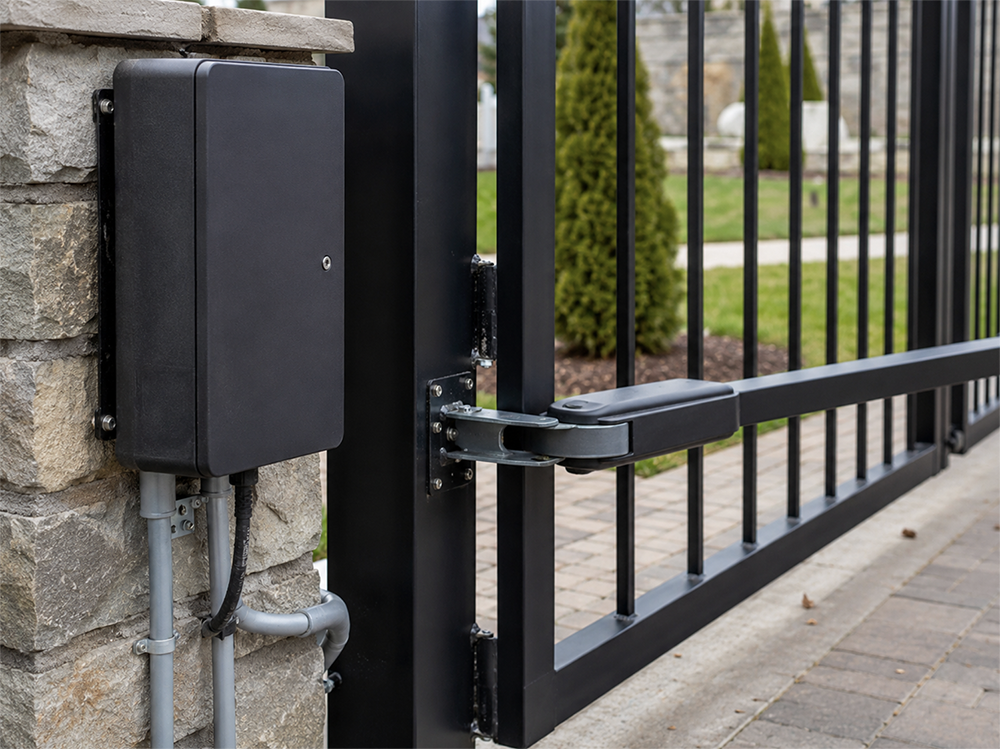
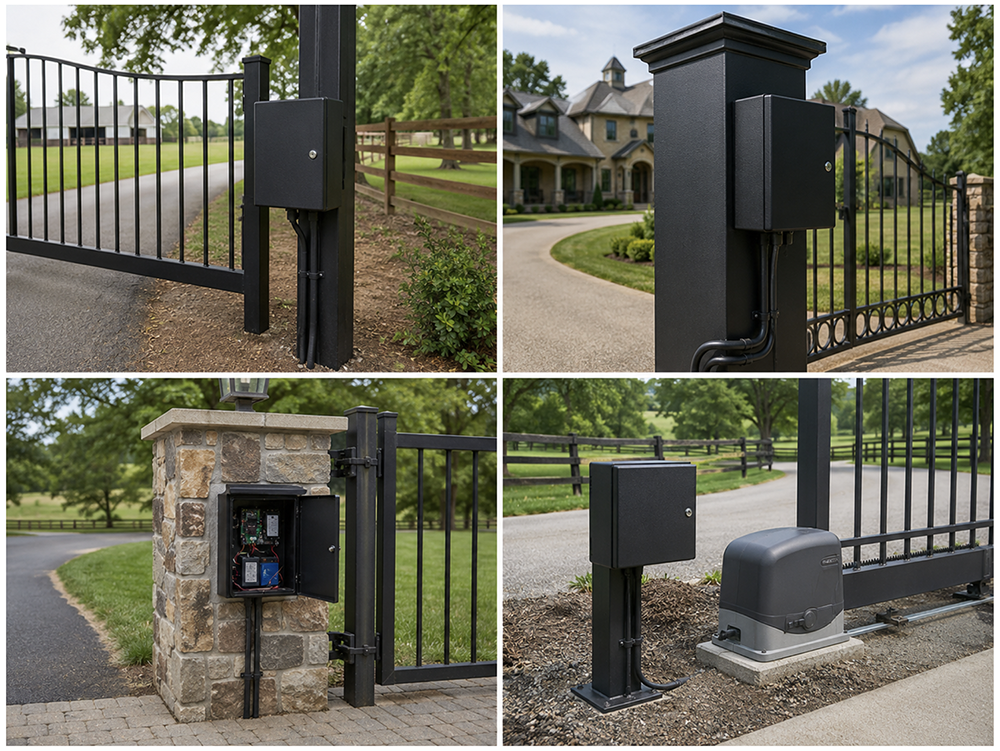
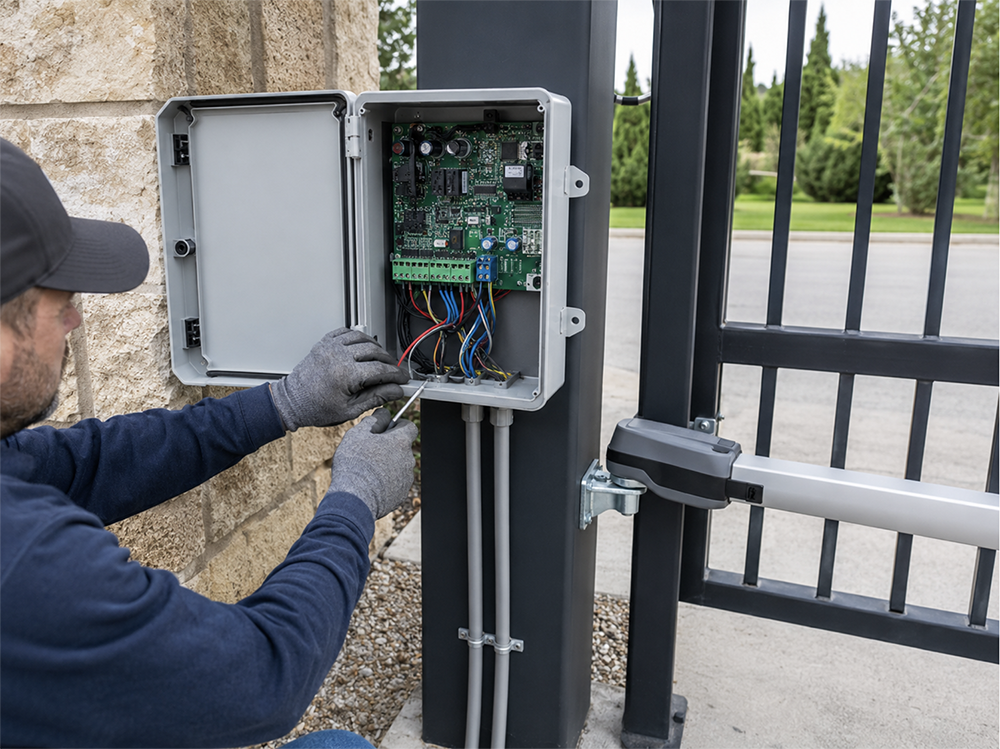
For most swing gate installations, the control box is mounted directly onto one of the gate posts.
At System Equine, this may be a standard 6-inch-by-6-inch steel post or one of our larger 18-inch-by-18-inch decorative steel posts. Mounting the box on the post keeps the gate, operator and control equipment together in one general area.
This creates a clean installation and makes the system easier to access for programming, inspections, battery replacement and future service.
The control box may also be incorporated into a decorative post skin or masonry pillar. However, these options need to be planned before the post or pillar is completed.
When mounting the control panel inside or against a masonry pillar, the opening must be large enough for the control box door to open fully. Technicians need clear access to the wiring, batteries and electronics inside the enclosure.
A control box should never be installed in a location where the door cannot open or where stonework, landscaping or other structures prevent the equipment from being serviced.
Why Should the Control Box Stay Close to the Gate?
We generally recommend installing the control box within approximately five feet of the gate.
The primary reason is the length of the operator wiring supplied with the system. The exact cable length varies by manufacturer and operator model, but many swing gate systems include approximately 50 feet of operator cable.
On a double swing gate, this wiring typically travels underground from the control panel to the operator on the opposite side of the driveway. The cable allows the control panel to communicate with and control both gate operators.
Keeping the control box close to the gate leaves more of the supplied cable available for crossing the driveway and connecting the two sides of the system.
When the control panel is installed farther away, some of the included cable must first travel from the operator to the distant control box. This reduces the amount of cable available for the rest of the installation and may require additional wire, conduit or connections.
Can the Control Panel Be Hidden?
Some customers prefer to move the control panel farther away so it is less visible from the driveway or entrance.
This is usually possible, but it must be planned carefully.
Moving the box away from the gate may require the operator cable to be extended. Depending on the distance, the installer may need to splice the wiring, install an additional junction box and run more conduit before the cable reaches the control panel.
These additional materials and labour can increase the installation cost.
A hidden control box may also be less convenient to access when the gate needs to be programmed, tested or serviced. Before choosing appearance over accessibility, customers should consider whether a technician will be able to reach the equipment easily in every season.
The most practical solution is often to mount the control panel directly to a post and use the gate design, post finish or surrounding landscaping to make it less noticeable without moving it too far from the operator.
Wiring and Conduit Planning
Why Should Operator Wire Splices Be Avoided?
Operator cable works best when it runs as one continuous strand between the control panel and the operator.
Every splice creates another possible point of failure. A connection may loosen, corrode or be affected by moisture over time. If a wiring issue develops underground or inside a junction box, troubleshooting the system can become more complicated.
This does not mean operator wire can never be extended. When completed correctly with the proper wire, conduit and weather-resistant connections, extensions can be used.
However, a continuous cable run is generally the cleaner and more reliable option. It reduces the number of connections and helps simplify future service.
Choosing a control panel location close to the gate is one of the easiest ways to reduce or eliminate the need for additional splicing.
Planning Conduit for the Control Panel
The control panel location should be chosen before the conduit and electrical work are completed.
Wiring may be required for the gate operator, safety photo eyes, keypads, intercoms, free-exit devices and other access-control equipment. On a double swing gate, conduit will also need to cross underneath the driveway so the control panel can connect to the operator on the opposite side.
The conduit should be properly sized and installed in the correct location before the gate posts and control equipment are mounted.
System Equine generally recommends using one-inch conduit beneath the driveway whenever possible. A larger conduit makes it easier to pull wiring during the initial installation and provides more room for future repairs or upgrades.
Smaller conduit can make wire pulling difficult, particularly when several cables need to share the same route or when bends are involved.
If conduit is blocked, damaged or installed incorrectly, installation work may need to stop until the issue is repaired. Planning the control box location early helps ensure the conduit ends in the correct place and reduces the chance of changes later.
Protecting and Accessing the Control Panel
Protecting the Control Panel from Water
The control boxes supplied by System Equine are designed for outdoor use and are fully weather-resistant when installed correctly.
Even with a waterproof enclosure, the direction in which the wires enter the box is extremely important.
All wiring should enter through the bottom of the control panel. Openings should not be drilled into the top of the enclosure.
A hole in the top creates a direct path for rain, melting snow and condensation to reach the internal electronics. Over time, water entering from above may damage the control board, wiring connections, batteries and other components.
Bringing the wiring in from underneath allows the enclosure to maintain its weather-resistant design and helps keep the internal components protected.
The control panel should also be mounted in a location where it will not be struck by the gate, a vehicle, snow-removal equipment or farm machinery.
Keeping the Control Box Accessible
The control panel should be easy for a technician to access.
Routine programming, troubleshooting and battery replacement all require the box to be opened. Enough space should be left around the enclosure for the door to swing open completely and for someone to work safely.
Avoid installing the control panel where it will eventually be blocked by fencing, dense landscaping, stacked materials or permanent structures.
If the box is placed inside a masonry pillar or decorative enclosure, there must be enough room to remove components and service the wiring without damaging the surrounding finish.
Accessibility is especially important during winter. The panel should not be located where snow will be regularly piled against it or where ice buildup will prevent the enclosure from opening.
A control panel that is slightly visible but easy to service is usually a better long-term choice than one that is completely hidden and difficult to reach.
Coordinating the Gate Installation
Who Should Choose the Final Location?
The customer can help select the final control panel location, especially when site photos and accurate measurements are provided during the quoting process.
However, the proposed location should be reviewed before the posts, pillars, conduit or electrical supply are installed.
The gate installer understands the operator’s wiring limits and the connections required for the system. The electrician needs to know where power must be delivered. If masonry work is involved, the mason needs the correct dimensions for any control box cutouts.
Coordinating these details early prevents situations where the electrical supply ends in the wrong location, the conduit cannot reach the panel or a masonry opening is too small.
The location should balance appearance, wiring distance, service access and protection from physical damage.
Do Not Overlook the Gate’s Location
While planning the control panel, it is also important to review the position of the entire gate entrance.
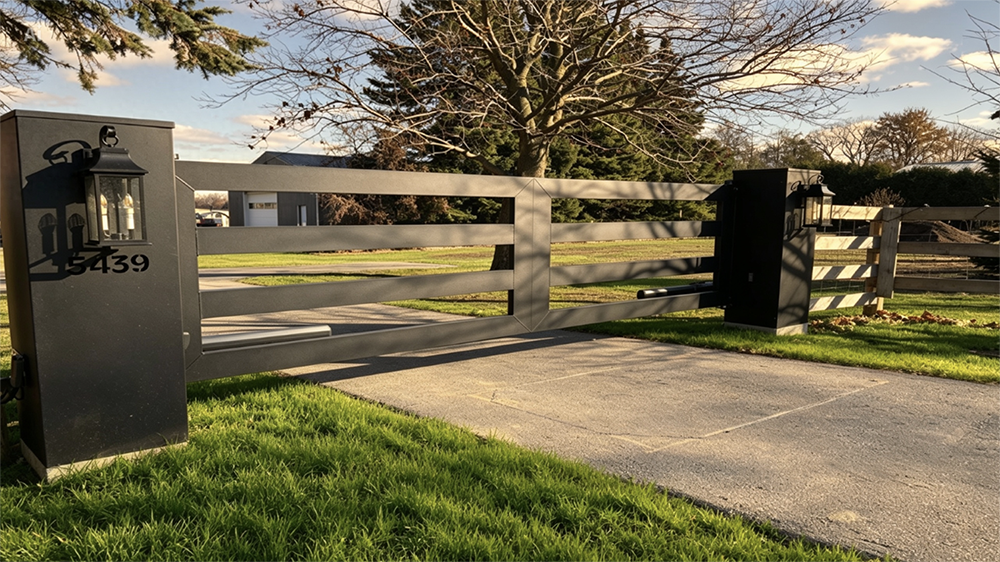
System Equine generally recommends installing the gate at least approximately 30 feet back from the roadway when the property layout allows.
This gives vehicles additional space to pull off the road while waiting for the gate to open. It is especially important for properties that regularly receive horse trailers, delivery vehicles, farm equipment or other large vehicles.
If the gate is positioned too close to the road, a long vehicle or trailer may remain partially in traffic while the driver enters a code or waits for the gate to open.
The control panel should then be positioned near the gate in a location that is easy to reach without interfering with the gate’s movement or the vehicles using the entrance.
Common Control Panel Placement Problems
Many control panel issues begin during the early planning stage.
One common problem is placing the box too far away from the gate. This can use more operator cable than expected and may require additional wire, splices, conduit and junction boxes.
Another issue is failing to allow enough room for the control panel door to open. This is especially common when the box is incorporated into masonry pillars or surrounded by landscaping.
Drilling holes in the top of the enclosure is another serious mistake. Even though the box is designed for outdoor use, top-entry wiring may allow water to reach the electronics.
Poorly planned conduit can also create major installation delays. If the conduit does not end underneath the control box, is too small or cannot be fished, it may need to be repaired before the gate system can be completed.
These problems are usually avoidable when the gate installer, electrician, customer and other contractors confirm the layout before work begins.
Choosing the Best Control Panel Location
For most swing gate installations, the best control panel location is directly on the gate post and within approximately five feet of the gate.
This position keeps the system organized, reduces unnecessary cable runs and allows the supplied operator wire to be used efficiently. It also provides convenient access for programming, battery replacement and future service.
The control panel can be hidden or incorporated into a decorative post or masonry pillar, but the location must still provide enough room for the box to open and be serviced.
All wiring should enter from underneath the enclosure, and the panel should remain clear of the moving gate, vehicles, snow buildup and other possible sources of damage.
Most importantly, the control panel location should be confirmed before the conduit, electrical work, posts and masonry are installed. A small amount of planning at the beginning can prevent additional costs, wiring complications and service issues later.
When planning an automated gate installation, System Equine can help review the gate layout, operator requirements, post selection, control panel location and conduit plan before installation begins.
System Equine — Your Equine Solutions Partner
Don’t forget to follow us on social media to see more of our work!