A Complete Guide for DIY Installers & Professional Contractors
Proper stall mat installation is one of the most overlooked — and most critical — aspects of barn design. When done correctly, stall mats protect your investment, improve horse comfort, reduce labor, and dramatically improve long-term cleanliness. When done poorly, they trap moisture, harbor bacteria, shift under load, and create daily frustration for staff.
This guide walks through best-practice installation, layout patterns, and cleaning strategies for both self-installers and professional contractors.
Why Stall Mat Installation Matters More Than You Think
A stall mat is not just a rubber floor covering — it is part of a system that includes:
- Sub-base preparation
- Drainage strategy
- Cleaning workflow
- Daily labor efficiency
- Long-term horse health
Most mat failures are not product failures — they are installation failures.
Step 1: Preparing the Stall Base (Non-Negotiable)
Ideal Base Build-Up (Bottom → Top)
- Undisturbed subgrade (clay or native soil)
- Compacted granular base
- ¾” minus or limestone screenings,
- Minimum 4–6” compacted if you go any less will not hold up
- Water based and compact it several times
- Laser-level finish
- Flat, tight, and firm — no soft spots
Key Rule:
If you can dent the base with your boot heel, it is not ready.
Do not install mats over:
- Sand
- Shavings
- Uneven concrete
- Mud or loose fill
Step 2: Choosing the Right Mat Type
Recommended Specs
- Thickness: ¾”
- Material: Vulcanized rubber (non-foam)
- Edges: Straight edge or tight-lock interlocking
Avoid lightweight mats — they curl, creep, and trap moisture.
Avoid Seconds for permanent installations, they are great in areas where you can swap out if they degrade.
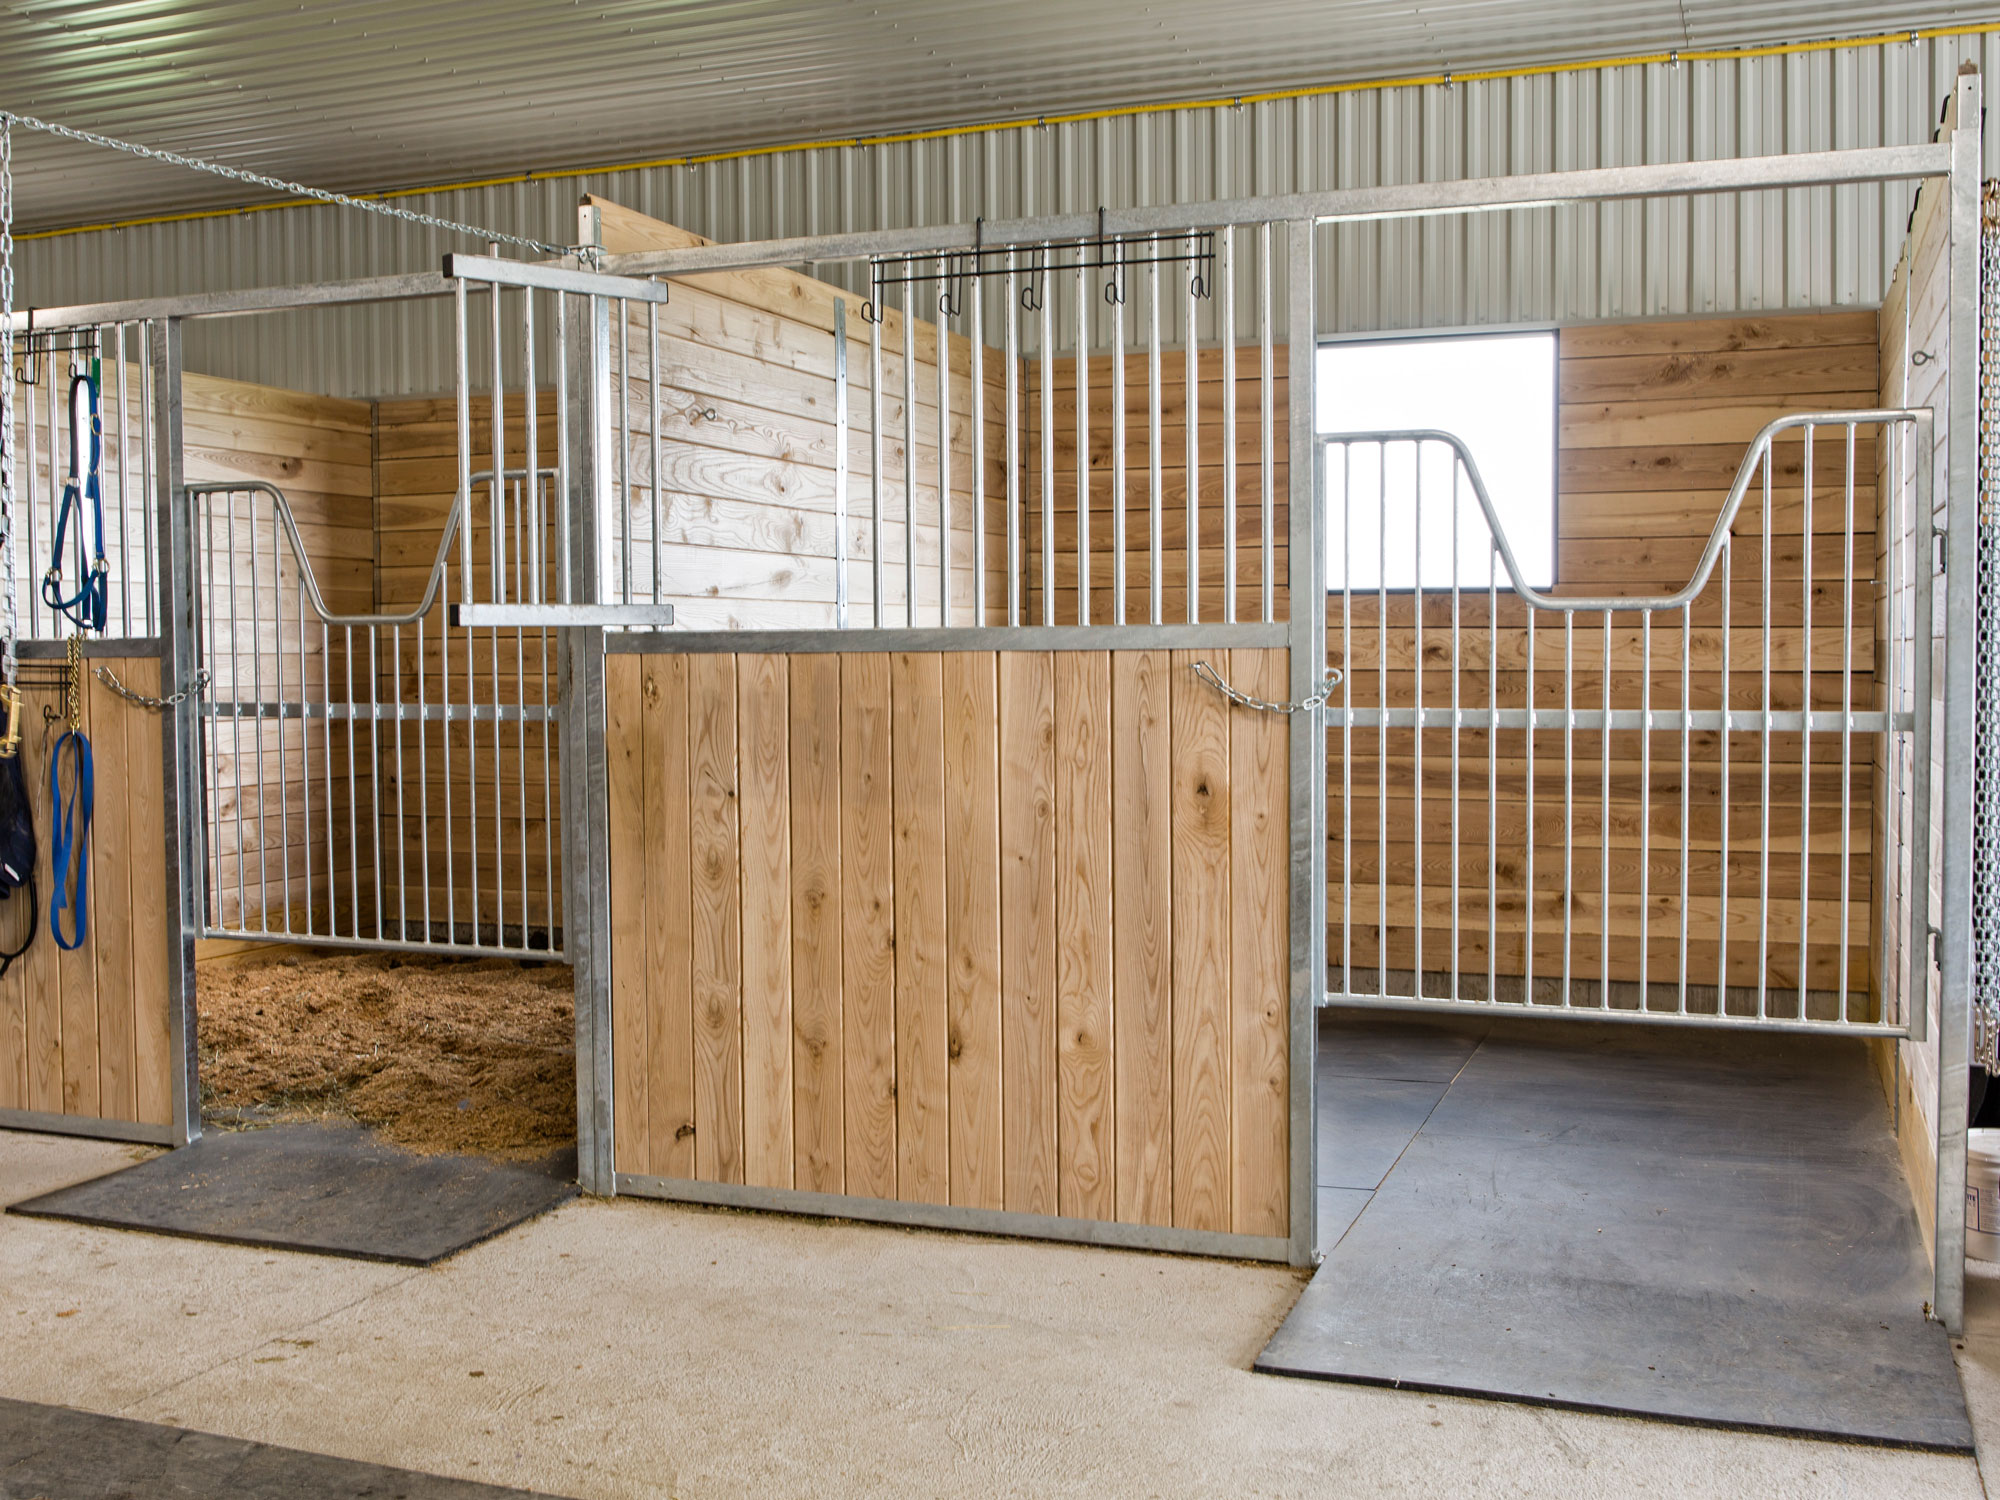
Step 3: Stall Mat Layout Patterns (This Is Where Most People Go Wrong)
Standard Stall Sizes Covered
- 10′ × 10′
- 10′ × 12′
- 12′ × 12′
Golden Layout Rule
Never align seams with the stall door opening or primary cleaning path.
Recommended Layout Pattern
Why It Works
- Prevents seam lift during cleaning
- Reduces urine migration between mats
- Improves long-term stability
- Makes individual mat removal possible
How to Install
- Start with full mats at the back wall
- Offset seams like brickwork
- Cut edge pieces tight to walls
- Keep factory edges facing inward when possible
Door Area Strategy (Critical Detail)
Best Practice
- Use one continuous mat at the doorway if possible
- No seams within 24″ of the door opening
- Mats should sit flush to the door frame
- No lips or ramps — horses trip on them
This is the highest-wear zone in the stall.
Cutting Mats: Clean, Tight, Professional
Tools That Work
- Heavy-duty utility knife (new blades)
- Chalk line or silver marker
- Straight edge
- Knee pads (trust us)
Pro Tip
Cut mats outside or in a warm space. Cold rubber fights back.
Step 4: Installation Sequence (Contractor-Grade Method)
- Dry-fit all mats before final placement
- Square the first mat off the back wall
- Work forward toward the door
- Trim perimeter last
- Walk the entire stall — no rocking, no gaps
❌ Do not glue mats in standard stalls
(Glue traps moisture and complicates replacement)
Cleaning & Daily Maintenance Layout Strategy
Smart Cleaning Design Starts at Installation
Proper layout allows:
- Partial mat lifting (not full stall teardown)
- Targeted cleaning of wet zones
- Faster turnaround between horses
Best Practice Zones
- Wet zone: Back third of stall
- Dry zone: Front third (feeding / standing)
Design seams so the wet zone mat can be lifted independently.

Deep Cleaning & Disinfection Protocol
Monthly / Quarterly Maintenance
- Strip bedding
- Lift rear mats only
- Scrape and remove residue
- Disinfect base (barn-safe solution)
- Allow to dry
- Reinstall mats tight
This keeps ammonia, bacteria, and odor under control.
Common Installation Mistakes (and Why They Cost You)
❌ Seams lined up with door
❌ Mats installed over sand
❌ Gaps at walls
❌ Thin mats in high-traffic stalls
❌ No plan for lifting or cleaning
Each mistake increases:
- Daily labor time
- Odor issues
- Mat movement
- Long-term replacement cost
DIY Installer vs Professional Contractor: What Changes?
DIY Installer
- Take extra time on base prep
- Dry-fit everything
- Use offset seams
- Don’t rush cuts
Professional Contractor
- Laser-level base
- Consistent seam strategy across the barn
- Document layout for future replacements
- Install with cleaning workflow in mind
Final Takeaway
A well-installed stall mat system:
- Feels solid underfoot
- Stays tight for years
- Cleans faster
- Smells better
- Protects horses and staff
Whether you’re installing one stall or one hundred, layout and preparation matter more than the mat itself. For more information or help getting started, contact our team of experts at System Equine today.
1-PAGE CONTRACTOR INSTALL CHECKLIST
Horse Stall Rubber Flooring System
Red Barn Stall Mats / StableComfort by Promat
Use this checklist before, during, and after installation.
Failure to meet base or layout requirements will result in mat movement, moisture issues, and premature failure.
1. PRE-INSTALLATION (BASE & SITE)
☐ Stall area cleared of debris, bedding, and loose material
☐ Subgrade proof-rolled; soft spots removed and recompacted
☐ Granular base installed:
- ☐ ¾” minus stone or limestone screenings
- ☐ Min. 4″ compacted (6″ recommended on clay soils)
☐ Base mechanically compacted to refusal
☐ Base laser-leveled and flat (no dips, crowns, or soft areas)
☐ Installer cannot dent base with boot heel
☐ Installation area dry and at ambient temperature
❌ Sand, bedding, loose screenings, or mud NOT permitted
2. MATERIAL VERIFICATION
☐ Mats are Red Barn Stall Mats
☐ Mat thickness verified:
- ☐ ¾” minimum
☐ Mats acclimated on site prior to cutting
☐ All cutting tools on hand (new blades, straight edge, marker)
3. LAYOUT & SEAM RULES (CRITICAL)
☐ Brick-bond / offset seam layout confirmed
☐ No continuous seams running full stall length or width
☐ No seams within 24″ (600 mm) of stall door opening
☐ Factory edges used at primary seams where possible
☐ Cut edges placed tight to walls — not in traffic zones
4. DOOR THRESHOLD DETAIL
☐ One continuous mat at door opening (no seam)
☐ Mat tight to door frame or threshold
☐ Door clears mat without dragging
☐ No raised lips, ramps, or bevels
5. PERIMETER & CUTTING
☐ Mats cut tight to stall walls, posts, and partitions
☐ Maximum gap at perimeter: ¼” (6 mm)
☐ No sealant, adhesive, or cove base at walls
☐ All mats lie flat with no rocking
6. CLEANING & WET ZONE STRATEGY
☐ Rear (wet zone) mats independently removable
☐ Front (dry zone) mats remain undisturbed during cleaning
☐ Seam layout supports partial lifting — not full teardown
7. FINAL WALK & ACCEPTANCE
☐ Walk entire stall — no movement under foot
☐ Adjacent mat height difference ≤ ⅛” (3 mm)
☐ Door zone inspected for wear risk
☐ Base remains firm after installation
☐ Stall accepted for bedding and use
Installer: ___________________________
Date: ______________________________
Project: ____________________________
Don’t forget to follow us on social media to see more of our work!
![]()
![]()
![]()